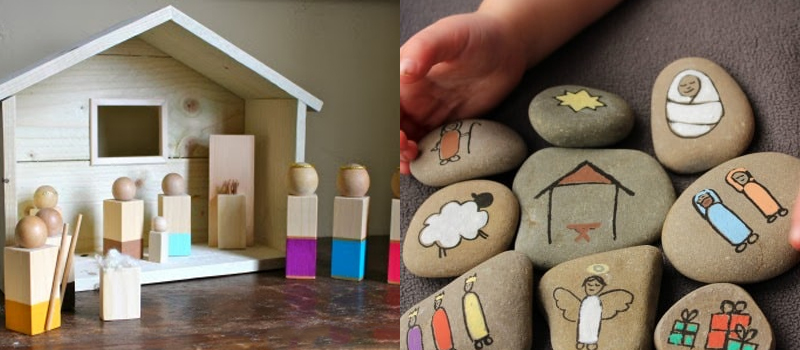
With Christmas quickly approaching, getting caught up in all the decorating, shopping, and gift giving is quite easy to do. Sometimes the true spirit of this holiday season falls by the wayside. The best way to celebrate the spirit of Christmas while waist deep in all the fun to be had is by spending time with your family.
Creating DIY Christmas projects is an exciting, creative way to do that. One of the craft themes I’m most inspired this Christmas by DIY Nativity scenes. These crafts truly capture what Christmas is all about, and they are crazy fun to make with kids, friends, and family alike.
Just take a quick look around online, and you’ll be amazed to find all sorts of ideas that get the top prize in originality. Here are some I was so blown away by. Now the tough part is choosing which one to do with my kiddos.
DIY Advent Calendar
I’m absolutely in love with thisidea from DigitProp.com. I’m so bored each year by those cardboard advent calendars I buy for my kids, and I always wonder how long that chocolate inside has been sitting around. But the wooden calendars are so expensive!
Creating your own calendar you can use every Christmas gets the kids involved, and it’s such a wonderful opportunity to connect with Christmas in the process. Little matchboxes are the perfect size to tuck away some sweet treats for the kids without going overboard. And what is cuter than little sheep and shepherds the kids decorate themselves? Here’s what you’ll need.
Supplies
Printer-friendly cardstock
Markers, crayons, colored pencils, chalk, pastels, etc.
Scissors
Glue
Sealant – optional (Modge Podge or similar)
Directions
You can use the template provided at DigitProp, or you can create your own template, just keep the size of the matchbox in mind. Just print out the template and color it in using any medium you choose. Whatever you choose to use, colors that saturate the cardstock well will give you the best results. I suggest using a high-quality crayon for the little ones, and colored pencils for the older kids and grown ups. Use sealant if you prefer to extend the life of the color.
Once you’ve decorated your pieces, cut them out and glue them onto the matchbox. It’s up to you whether you’d like to number each one as well. There you go. Let the kids open one up each day to find a little treasure inside!
Travel Size Paper City Nativity Scene
So many of us travel to and fro during the holidays. While we’re spending hours in the car or on the plane with our little ones, why not give them a Christmas themed play scene to take along with them for some fun? This travel size paper city nativity scene from MadeByJoel is so much fun to decorate, and there are plenty of pieces to go around for all the kids involved!
Supplies
Printer-friendly cardstock
Markers, crayons, colored pencils, chalk, pastels, etc.
Scissors
Sealant – optional (Modge Podge or similar)
Joel has made things easy by providing a complete template for this fun pint-size nativity scene. Just print it out on cardstock, and you’re ready to start adorning! For older kids and grown ups, permanent markers will give those figurines deep, rich color. For the kids, you may want to stick to something a little more washable such as brush markers. Decorate, cut out, fold, and enjoy!
DIY Nativity Story Stones
RainyDayMum offers a creative, unique twist on nativity scenes with her Nativity Story Stones. Any smooth stone will do fine for this little nativity. The only thing you need besides that is some quality black ink markers, colorful multi-surface markers or paint, and a bit of imagination!

